**Scroll down this post to see a Quilted Tutorial using a sewing machine**
It's Helen here with some more inspiration for our current challenge, where the theme is:
It's Helen here with some more inspiration for our current challenge, where the theme is:
'Q is for Quilting'
Make
a patchwork 'quilt' effect on your card/project.
Here's a reminder of our two fabulous sponsors:
Prize from Lili of the Valley:
and
Prize from Crop Stop: a $15 Gift Certificate!
how she created the quilted background on this card...
Supplies:
1"x 5" stripes of paper
5 1/4" x 5 1/4" card stock (for the base)
Colored image and mat
I used James Bear - Pile of Presents from our sponsor Lili of the Valley
1. Cut your strips of paper into 1" cubes...
2. Arrange your squares in the pattern you want.
Turn them over and put a small amount of adhesive on the back.
**Note - you want to only place a little adhesive in the middle. You do not want the adhesive near the edges of the paper or it will gum up your sewing needle**
3. Adhere the squares to the 5 1/4" x 5 1/4" piece of card stock as neatly as possible.
It's ok if there are a few jagged edges because the zig zag stitch will hide a small amount of imperfection...
4. Put the sewing machine foot in between the squares of paper as centered as possible.
**I "back stitch" for a turn or two at the beginning and end of the row to help tie the edges.**
5. Stitch along each line...
6. Once one side is done, rotate the paper and stitch along the other lines...
7. After the inside lines are done, stitch along the outside.
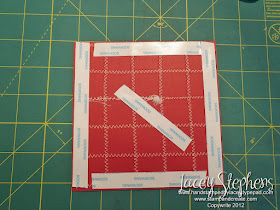
When you turn it over, it will look like this...
(Yes, I made a boo-boo, my machine jammed up. But it only shows up on the backside.)
So you see how ugly that is (even without the boo-boo)? You don't want that on the inside of your card, so I always sew onto a mat and attach that to the card base...
8. Attach the sewed layers onto your card base...
9. Decorate as desired...
This is a great design to get rid of little leftover pieces of designer paper as well.
I used new strips of new paper, but you could easily use scraps!!
Can't wait to see you do it now!!
Wowee - that's awesome Lacey...thanks so much for sharing!
You can find lots more examples, and the linky to add your entry on this post.


Great cards girls Lacet your Tutorial is brilliant!!!! Hugs me xx
ReplyDeleteDOH! Flipping iPhone ... Lacey sorry for the typo!! Argh! Xxx
ReplyDeleteThis comment has been removed by the author.
ReplyDelete